This is a documentation for Board Game Arena: play board games online !
Tutorial reversi: Perbedaan antara revisi
| Baris 361: | Baris 361: | ||
If you want to look into details, please look at the "utility method" sections of reversi.game.php. | If you want to look into details, please look at the "utility method" sections of reversi.game.php. | ||
== Display allowed | == Display allowed moves == | ||
Now, what we want to do is highlight squares where player can place a disc. | Now, what we want to do is highlight squares where player can place a disc. | ||
| Baris 379: | Baris 379: | ||
We are of course using the "getPossibleMoves" method we just developed. | We are of course using the "getPossibleMoves" method we just developed. | ||
Now, let's go to the client side to use the data returned by the method above: | Now, let's go to the client side to use the data returned by the method above. We are using the "onEnteringState" Javascript method that is called each time we enter into a new game state: | ||
<pre> | |||
onEnteringState: function( stateName, args ) | |||
{ | |||
console.log( 'Entering state: '+stateName ); | |||
switch( stateName ) | |||
{ | |||
case 'playerTurn': | |||
this.updatePossibleMoves( args.args.possibleMoves ); | |||
break; | |||
} | |||
}, | |||
</pre> | |||
So, when we are entering into "playerTurn" game state, we are calling our "updatePossibleMoves" method. This method looks like this: | |||
<pre> | |||
updatePossibleMoves: function( possibleMoves ) | |||
{ | |||
// Remove current possible moves | |||
dojo.query( '.possibleMove' ).removeClass( 'possibleMove' ); | |||
for( var x in possibleMoves ) | |||
{ | |||
for( var y in possibleMoves[ x ] ) | |||
{ | |||
// x,y is a possible move | |||
dojo.addClass( 'square_'+x+'_'+y, 'possibleMove' ); | |||
} | |||
} | |||
this.addTooltipToClass( 'possibleMove', '', _('Place a disc here') ); | |||
}, | |||
</pre> | |||
The idea here is that we've created a CSS class ("possibleMove") that can be applied to a "square" element to highlight it. | |||
At first, we remove all "possibleMove" classes currently applied with the very useful combination of "dojo.query" and "removeClass" method. | |||
Then we loop through all possible moves that our PHP "updatePossibleMoves" create for us, and add the "possibleMove" class to corresponding square. | |||
Finally, we use BGA framework "addTooltipToClass" method to associate a tooltip to all these highlighted squares in order players can understand the meaning of this. | |||
And here we are: | |||
[[File:reversi8.jpg.jpg]] | |||
Revisi per 24 November 2012 16.18
Introduction
Using this tutorial, you can build a complete working game on BGA environment: Reversi game.
Before reading this tutorial, you must:
- Read the overall presentations of the BGA Framework (see here).
- Know the rules of Reversi.
- Know the languages used on BGA: PHP, SQL, HTML, CSS, Javascript.
Create your first game
With the initial skeleton of code provided initially, you can already start a game from the BGA Studio. For now, we are going to work with 1 player only. Most of the time this is simpler to proceed with only one player during the early phase of development of your game, as it's easy and fast to start/stop games.
Thus, you can start a "Reversi" game, and arrive on a void, empty game. Yeah.
Let it look like Reversi
It is always a good idea to start with a little bit of graphic work. Why? Because this helps to figure out how the final game will be, and issues that may appear later.
Be careful during designing the layout of your game: you must always keep in mind that players with a 1024px screen width must be able to play. Usually, it means that the width of the play area can be 750px (in the worst case).
For Reversi, it's useless to have a 750x750px board - much too big, so we choose this one which fit perfectly (536x528):
Note that we are using a jpg file. Jpg are lighter than png, then faster to load. Later we are going to use PNGs for discs for transparency purpose.
Now, let's make it appears on our game:
- upload board.jpg in your "img/" directory.
- edit "reversi_reversi.tpl" to add a 'div' for your board:
<div id="board">
</div>
- edit your reversi.css file to transform it into a visible board:
#board {
   width: 536px;
   height: 528px;
   background-image: url('../../img/reversi/board.jpg');
}
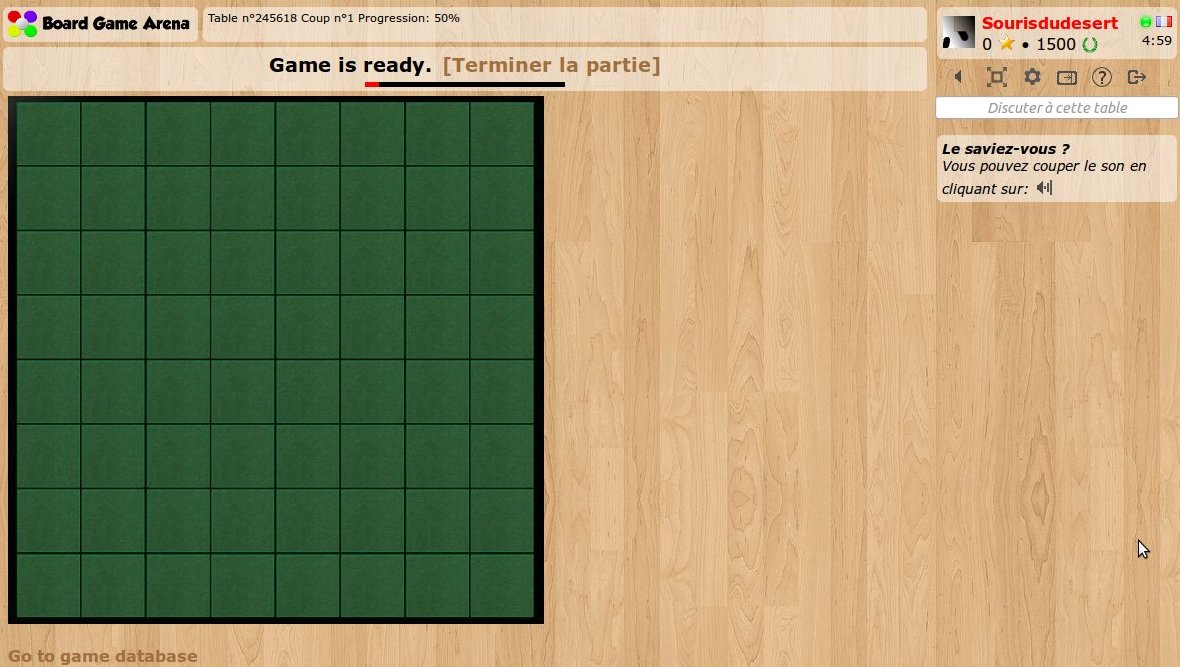
Refresh your page. Here's your board:
Make the squares appears
Now, what we need is to create some invisible HTML elements when squares are. These elements will be used as position references for width&black discs. Obviously, we need 64 squares. To avoid writing 64 'div' elements on our template, we are going to use the "block" feature.
Let's modify our template like this:
 <div id="board">
    <!-- BEGIN square -->
        <div id="square_{X}_{Y}" class="square" style="left: {LEFT}px; top: {TOP}px;"></div>
    <!-- END square -->
 </div>
As you can see, we created a "square" block, with 4 variable elements: X, Y, LEFT and TOP. Obviously, we are going to use this block 64 times during page load.
Let's do it in our "reversi.view.php" file:
        $this->page->begin_block( "reversi_reversi", "square" );

        $hor_scale = 64.8;
        $ver_scale = 64.4;
        for( $x=1; $x<=8; $x++ )
        {
            for( $y=1; $y<=8; $y++ )
            {
                $this->page->insert_block( "square", array(
                    'X' => $x,
                    'Y' => $y,
                    'LEFT' => round( ($x-1)*$hor_scale+10 ),
                    'TOP' => round( ($y-1)*$ver_scale+7 )
                ) );
            }
        }
Note: as you can see, squares in our "board.jpg" files does not have an exact width/height in pixel, and that's the reason we are using floating point numbers here.
Now, to finish our work and check if everything works fine, we are going to style our square a little bit in our CSS stylesheet:
#board {
    width: 536px;
    height: 528px;
    background-image: url('../../img/reversi/board.jpg');
    position: relative;
}

.square {
    width: 56px;
    height: 56px;
    position: absolute;
    background-color: red;
}
Explanations:
- With "position: relative" on board, we ensure square elements are positioned relatively to board.
- For the test, we use a red background color for the square. This is a useful tip to figure out if everything is fine with invisible elements.
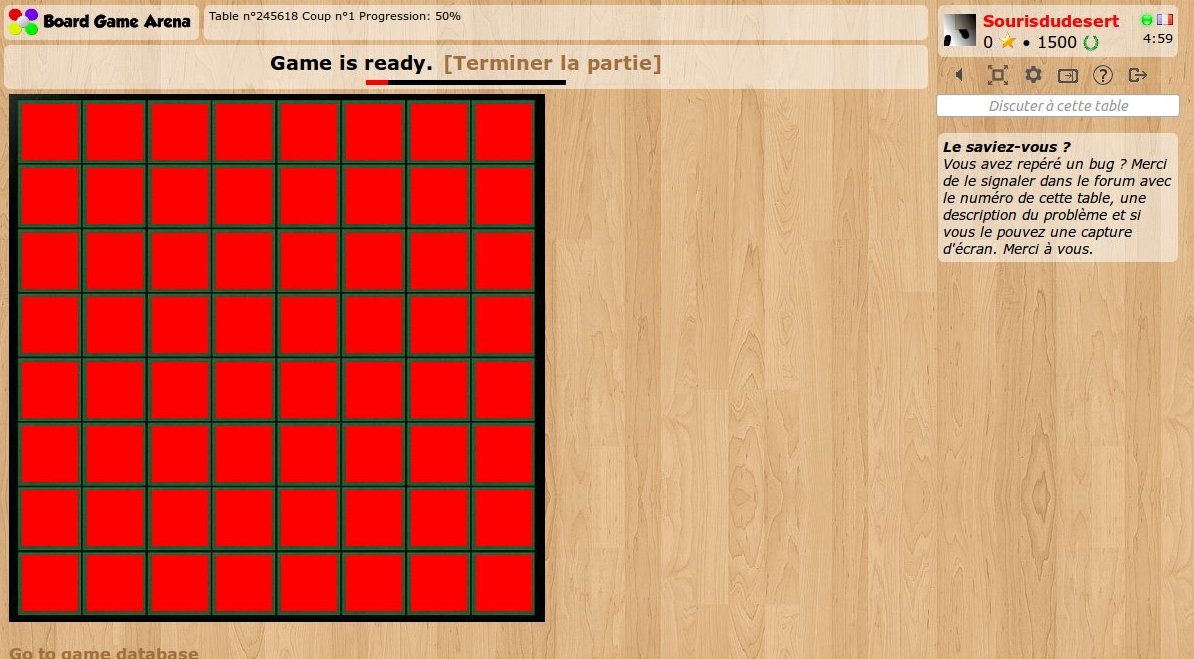
Let's refresh and check our our (beautiful) squares:
The discs
Now, our board is ready to receive some disc tokens!
At first, we introduce a new 'div' element as a child of "board" to host all these tokens (in our template):
    <!-- END square -->

    <div id="tokens">
    </div>
</div>
Then, let's introduce a new piece of art with the discs. We need some transparency here so we are using a png file:
Important: we are using ONE file for both discs. It's really important that you use a minimum number of graphic files for your game with this "CSS sprite" technique, because it makes the game loading faster and more reliable. Read more about CSS sprites.
Now, let's separate the disc with some CSS stuff:
.token {
    width: 56px;
    height: 56px;
    position: absolute;
    background-image: url('../../img/reversi/tokens.png');
}
.tokencolor_ffffff { background-position: 0px 0px;   }
.tokencolor_000000 { background-position: -56px 0px;   }
With this CSS code, is we apply the classes "token" and "tokencolor_ffffff" to a div element, we got a white token. Yeah.
Note the "position: absolute" which allow us to position tokens on the board and make them "slide" to their positions.
Now, let's make a first token appears on our board. Disc tokens are not visible at the beginning of the game: they appear dynamically during the game. For this reason, we are going to make them appear from our Javascript code, with a BGA Framework technique called "JS template".
In our template file (reversi_reversi.tpl), let's create the piece of HTML needed to display our token:
<script type="text/javascript">

// Templates

var jstpl_disc='<div class="disc disccolor_${color}" id="disc_${xy}"></div>';

</script>
Note: we already created the "templates" section for you in the game skeleton.
As you can see, we defined a JS template named "jstpl_disc" with a piece of HTML and two variables: the color of the token and its x/y coordinates. Note that the syntax of the argument is different for template block variables (brackets) and JS template variables (dollar and brackets).
Now, let's create a method in our Javascript code that will make a token appear on the board, using this template:
        addTokenOnBoard: function( x, y, player )
        {
            dojo.place( this.format_block( 'jstpl_token', {
                xy: x+''+y,
                color: this.gamedatas.players[ player ].color
            } ) , 'tokens' );

            this.placeOnObject( 'token_'+x+''+y, 'overall_player_board_'+player );
            this.slideToObject( 'token_'+x+''+y, 'square_'+x+'_'+y ).play();
        },
At first, with "dojo.place" and "this.format_block" methods, we create a HTML piece of code and insert it as a new child of "tokens" div element.
Then, with BGA "this.placeOnObject" method, we place this element over the panel of some player. Immediately after, using BGA "this.slidetoObject" method, we make the disc slide to the "square" element, its final destination.
Note: don't forget to call the "play()", otherwise the token remains at its original location.
Note: note that during all the process, the parent of the new disc HTML element will remain "tokens". placeOnObject and slideToObject methods are only moving the position of elements on screen, and they are not modifying the HTML tree.
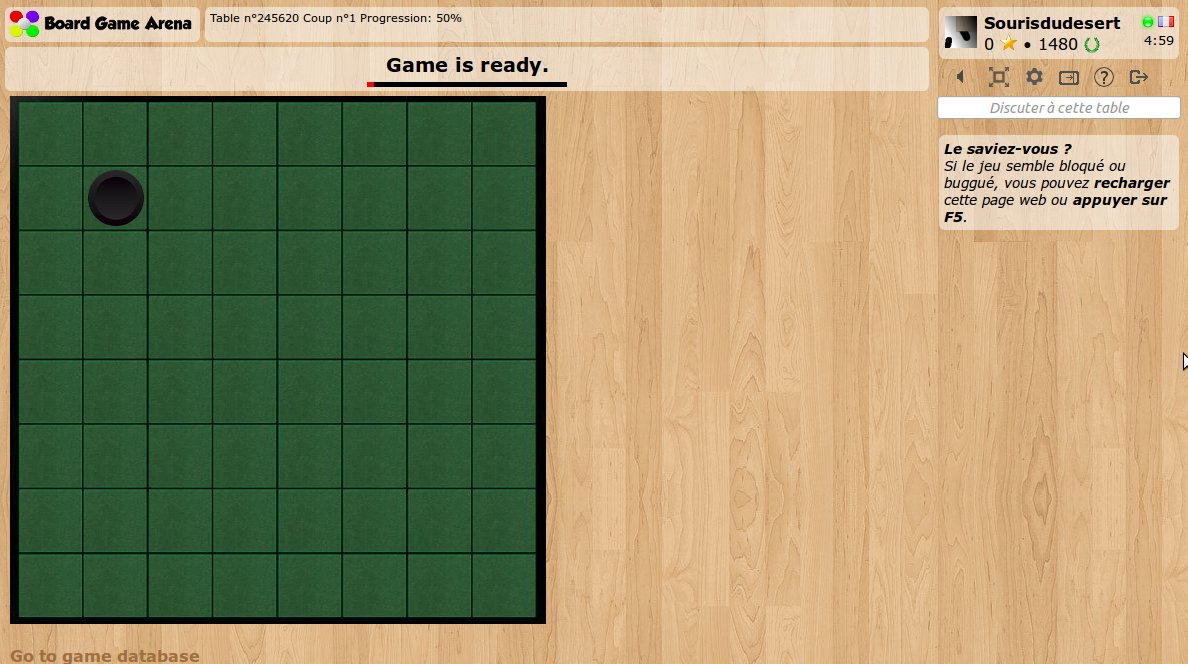
Now, to test if everything works fine, just call "addTokenOnBoard( 2, 2, <your_player_id> )" in your "setup" Javascript method, and reload the page. A token should appear and slide immediately to its position, like this:
The database
We did most of the client-side programming, so let's have a look on the other side now.
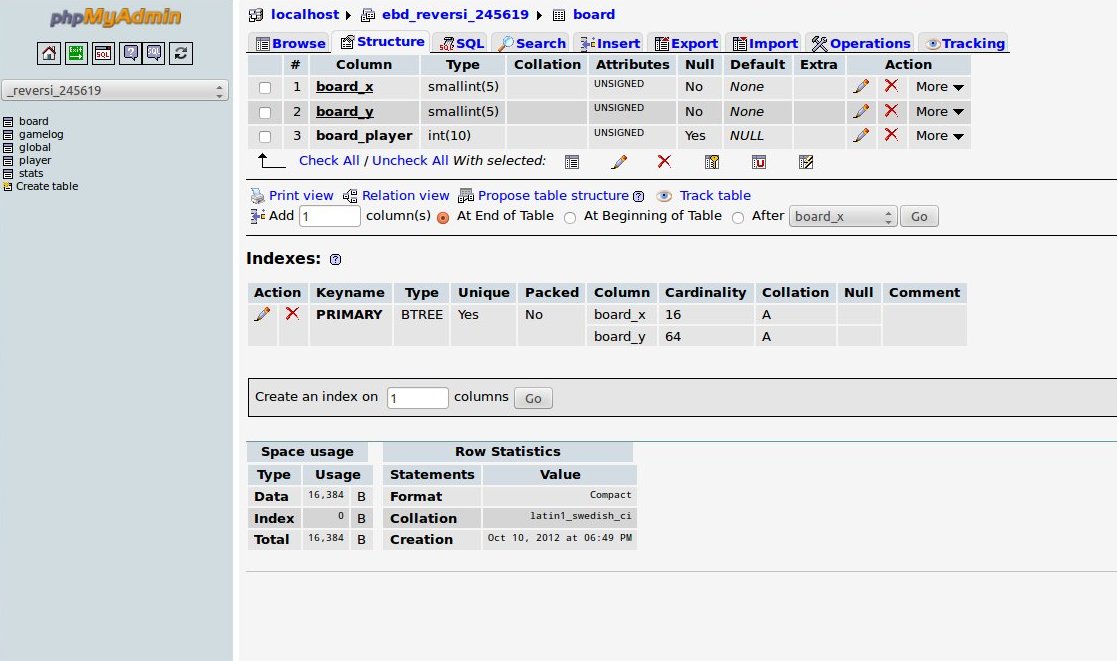
To design the database model of our game, the best thing to do is to follow the "Go to game database" link at the bottom of our game, to access the database directly with a PhpMyAdmin instance.
Then, you can create the tables you need for your table (do not remove existing tables!), and report every SQL command used in your "dbmodel.sql" file.
The database model of Reversi is very simple: just one table with the squares of the board. In our dbmodel.sql, we have this:
CREATE TABLE IF NOT EXISTS `board` (
  `board_x` smallint(5) unsigned NOT NULL,
  `board_y` smallint(5) unsigned NOT NULL,
  `board_player` int(10) unsigned DEFAULT NULL,
  PRIMARY KEY (`board_x`,`board_y`)
) ENGINE=InnoDB;
Now, a new database with a "board" table will be created each time we start a Reversi game. This is why after modifying our dbmodel.sql it's a good time to stop & start again our game.
Setup the initial game position
The "setupNewGame" method of our reversi.game.php is called during initial setup: this is the place to initialize our data and to place the initial tokens on the board (initially, there are 4 tokens on the board).
Let's do this:
        // Init the board
        $sql = "INSERT INTO board (board_x,board_y,board_player) VALUES ";
        $sql_values = array();
        for( $x=1; $x<=8; $x++ )
        {
            for( $y=1; $y<=8; $y++ )
            {
                $token_value = "NULL";
                if( ($x==4 && $y==4) || ($x==5 && $y==5) )  // Initial positions of white player
                    $token_value = "'$whiteplayer_id'";
                else if( ($x==4 && $y==5) || ($x==5 && $y==4) )  // Initial positions of black player
                    $token_value = "'$blackplayer_id'";

                $sql_values[] = "('$x','$y',$token_value)";
            }
        }
        $sql .= implode( $sql_values, ',' );
        self::DbQuery( $sql );


        // Active first player
        self::activeNextPlayer();
As you can see, we create one database entry for each square, with a "NULL" value which mean "empty square". Of course, for 4 specific squares, we place an initial token.
At the end, we active the first player to make it active at the beginning of the game.
Now, we need to make these tokens appears on the client side. To achieve this, the first step is to return the token positions with our "getAllDatas" PHP method (called during each page reload):
        // Get reversi board token
        $result['board'] = self::getObjectListFromDB( "SELECT board_x x, board_y y, board_player player
                                                       FROM board
                                                       WHERE board_player IS NOT NULL" );
As you can see, we are using the BGA framework "getObjectListFromDB" method that format the result of this SQL query in a PHP array with x, y and player attribute.
The last thing we need to do is to process this array on client side, and place a disc token on the board for each array item. Of course, we are doing this is our Javascript "setup" method:
            for( var i in gamedatas.board )
            {
                var square = gamedatas.board[i];

                if( square.player !== null )
                {
                    this.addTokenOnBoard( square.x, square.y, square.player );
                }
            }
As you can see, our "board" entry created in "getAllDatas" can be used here as "gamedatas.board" in our Javascript. We are using our previously developed "addTokenOnBoard" method.
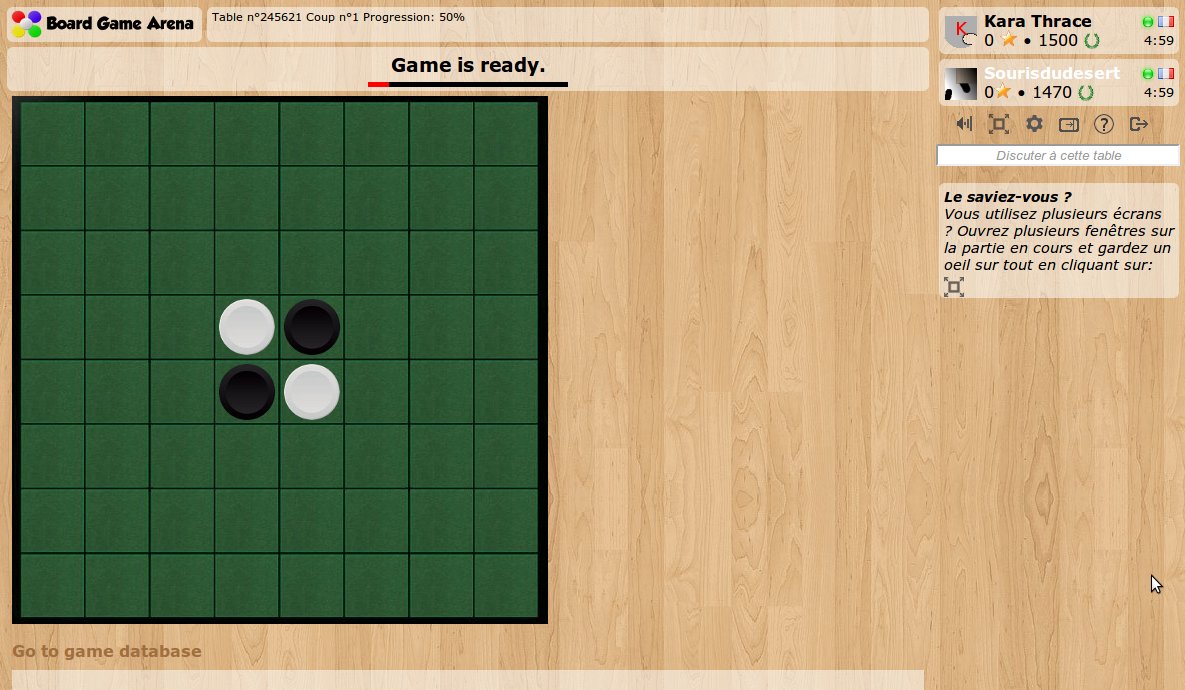
Reload... and here we are:
It starts to smell Reversi here...
The game state machine
Now, let's stop our game again, because we are going to start the core game logic.
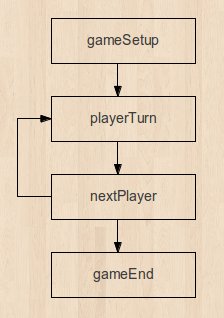
You already read the "Focus on BGA game state machine", so you know that this is the heart of your game logic. For reversi game, it's very simple although. Here's a diagram of our game state machine for Reversi:
And here's our "stats.inc.php", according to this diagram:
$machinestates = array(

    1 => array(
        "name" => "gameSetup",
        "description" => clienttranslate("Game setup"),
        "type" => "manager",
        "action" => "stGameSetup",
        "transitions" => array( "" => 10 )
    ),

    10 => array(
        "name" => "playerTurn",
		"description" => clienttranslate('${actplayer} must play a disc'),
		"descriptionmyturn" => clienttranslate('${you} must play a disc'),
        "type" => "activeplayer",
        "args" => "argPlayerTurn",
        "possibleactions" => array( 'playDisc' ),
        "transitions" => array( "playDisc" => 11, "zombiePass" => 11 )
    ),

    11 => array(
        "name" => "nextPlayer",
        "type" => "game",
        "action" => "stNextPlayer",
        "updateGameProgression" => true,
        "transitions" => array( "nextTurn" => 10, "cantPlay" => 11, "endGame" => 99 )
    ),

    99 => array(
        "name" => "gameEnd",
        "description" => clienttranslate("End of game"),
        "type" => "manager",
        "action" => "stGameEnd",
        "args" => "argGameEnd"
    )

);
Now, let's create in our reversi.game.php file the methods that are declared in this game states description file:
- argPlayerTurn
- stNextPlayer
... and start a new Reversi game.
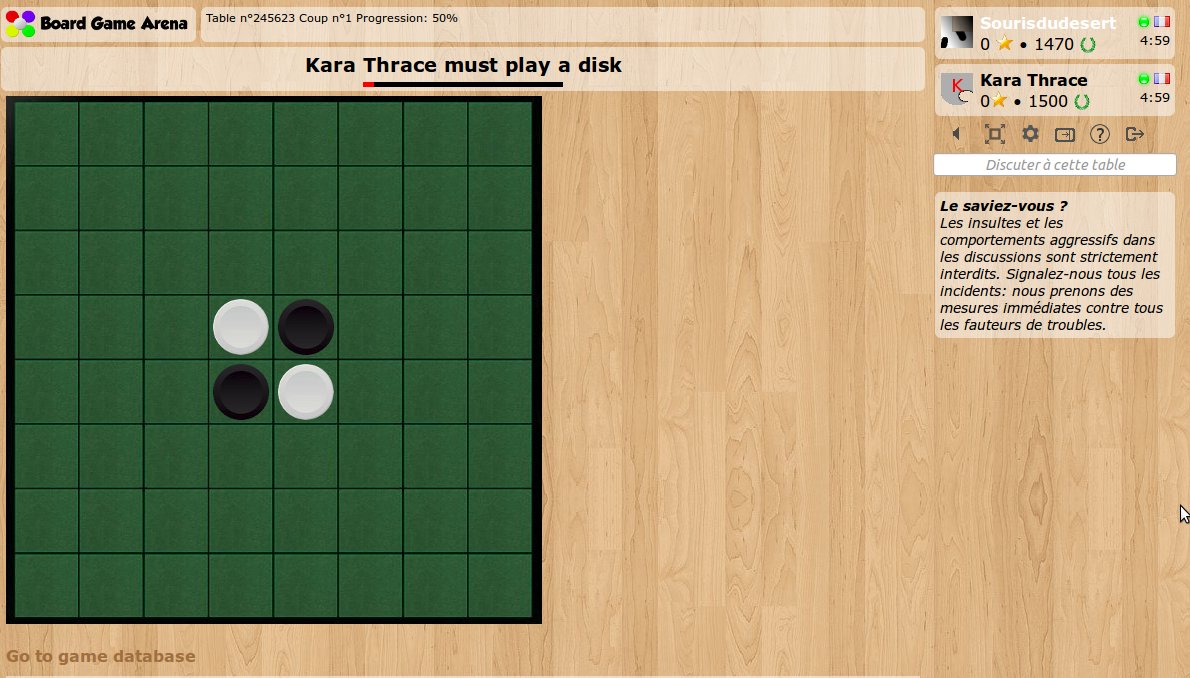
As you can see on the screen capture below, the BGA framework makes the game jump to our first game state "playerTurn" right after the initial setup. That's why the status bar contains the description of playerTurn state ("XXXX must play a disc"):
The rules
Now, what we would like to do is to indicate to the current player where it is allowed to play. The idea is to build a "getPossibleMoves" PHP method that return a list of coordinates where it is allowed to play. This method will be used in particular:
- As we just said, to help the player to see where he can play.
- When the player play, to check if he has the right to play here.
This is pure PHP programming here, and there's no special things from the BGA framework that can be used. This is why we won't go into details here. The overall idea is:
- Create a "getTurnedOverDiscs(x,y)" method that return coordinates of discs that would be turned over if a token would be played at x,y.
- Loop through all free squares of the board, call the "getTurnedOverDiscs" method on each of them. If at least 1 token is turned over, this is a valid move.
One important thing to keep in mind is the following: making a database query is slow, so please don't load the entire game board with a SQL query multiple time. In our implementation, we load the entire board once at the beginning of "getPossibleMoves", and then pass the board as an argument to all methods.
If you want to look into details, please look at the "utility method" sections of reversi.game.php.
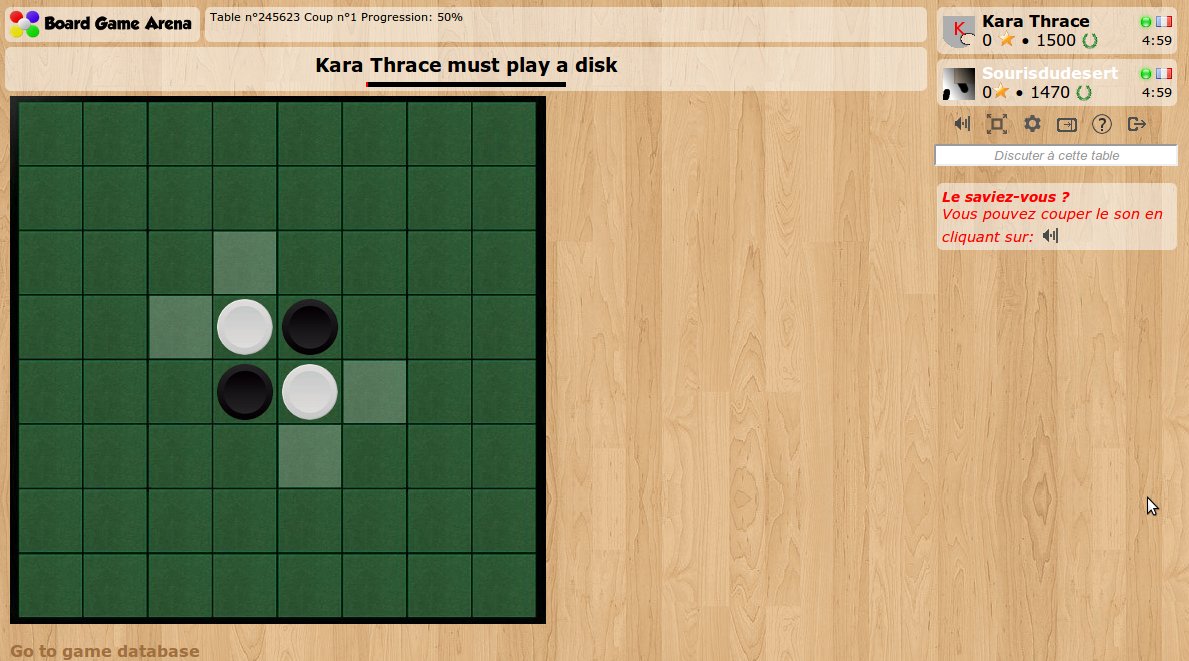
Display allowed moves
Now, what we want to do is highlight squares where player can place a disc.
To do this, we are using the "argPlayerTurn" method. This method is called each time we enter into "playerTurn" game state, and its result is transfered automatically to the client-side:
    function argPlayerTurn()
    {
        return array(
            'possibleMoves' => self::getPossibleMoves( self::getActivePlayerId() )
        );
    }
We are of course using the "getPossibleMoves" method we just developed.
Now, let's go to the client side to use the data returned by the method above. We are using the "onEnteringState" Javascript method that is called each time we enter into a new game state:
        onEnteringState: function( stateName, args )
        {
           console.log( 'Entering state: '+stateName );

            switch( stateName )
            {
            case 'playerTurn':
                this.updatePossibleMoves( args.args.possibleMoves );
                break;
            }
        },
So, when we are entering into "playerTurn" game state, we are calling our "updatePossibleMoves" method. This method looks like this:
        updatePossibleMoves: function( possibleMoves )
        {
            // Remove current possible moves
            dojo.query( '.possibleMove' ).removeClass( 'possibleMove' );

            for( var x in possibleMoves )
            {
                for( var y in possibleMoves[ x ] )
                {
                    // x,y is a possible move
                    dojo.addClass( 'square_'+x+'_'+y, 'possibleMove' );
                }
            }

            this.addTooltipToClass( 'possibleMove', '', _('Place a disc here') );
        },
The idea here is that we've created a CSS class ("possibleMove") that can be applied to a "square" element to highlight it.
At first, we remove all "possibleMove" classes currently applied with the very useful combination of "dojo.query" and "removeClass" method.
Then we loop through all possible moves that our PHP "updatePossibleMoves" create for us, and add the "possibleMove" class to corresponding square.
Finally, we use BGA framework "addTooltipToClass" method to associate a tooltip to all these highlighted squares in order players can understand the meaning of this.
And here we are:

